
What I hope to describe is how to enhance, re-instate or
create this lost or soft detail using tools you will probably already have, or
can obtain very cheaply. The process too is very simple, it just requires all
of the grooves, edges and joints to be lightly scraped to some extent.
I generally use two different scalpel blades for doing this,
the weapons of choice for me are a No.6 curved blade and a No.11P pointed
blade. I will always start off with new blades for each figure I prepare because
the blade really does have to be sharp for this. I also find it easier to use
the blade without a handle, just wrapping some tape around the end to hold them
more comfortably and give me more control.

The curved No.6 is used for most of the work, this one is
great for recreating undercuts and refining the points where dissimilar items
touch, (belt-to-jacket, jacket-to-trousers, etc), and most general scraping.
The second blade, the No.11P (Not a standard No.11) has a
very acutely angled tip which is perfect for recreating seam lines and detail
around webbing and buckles. This is usually held more perpendicular to the
surface so you are only using the very tip of the blade. The downside is that
this blade will lose its’ point very quickly and it will need replacing most
often, you are lucky if you can complete one figure with the same blade.
What you are trying to do is create a sharper edge around
parts, removing the soft radii of plastic that makes detail look soft. Just
take your time and work your way around the part methodically, gently scraping
with the blade (as if you were removing a seam line) but make sure you don’t
dig the blade in too deep. The key to the technique is to use very little
pressure when scraping, you don't want to remove too much material or leave
blade marks in the plastic. You are not ploughing furrows, so subtlety is key
here. If you press too hard you are also more likely to get blade “chatter”
where it jumps along the line and this leaves unsightly marks which are very
hard to get rid of. Remember, it is easier to go over an area again than it is
to repair it if you have gone too far.
The dodgy 3D image below shows the process, the material
you are trying to remove and roughly the angle I hold the blades at.

You can see on this torso a couple of before and after
shots. I have completed the scraping on the left hand side (as viewed), the
right being untouched.


A quick note here on plastic density. Do a test on
something unseen first before you commit to your potential masterpiece, I find
that the plastic from different manufacturers varies quite a lot. Dragon
figures range from hard to very hard, whilst Masterbox and Miniart figures are quite
soft. You may have to adjust the force required to get a good result without
damaging the part.
Very rarely it might be necessary to gently sand the area
after scraping with some fine wet & dry, usually a rub with a piece of well-worn
scotchbrite is enough to smooth everything out and remove any burrs. Finally I “dampen”
the worked area with a very small amount of Tamiya extra thin cement, this removes
any plastic fuzz that may be left over. Be very sparing with this otherwise all
of that detail you just created will melt back into goo.
The main subject I’m using for this article is one of the
figures from Dragon set 3022 “Delta
Force, Somalia 1993”, one of that manufacturer’s earlier releases and whilst
exhibiting fairly good detail, there is a lot going on with the uniform that we
can improve on.
The figure is depicted wearing Ranger body armour over a
standard BDU (Battle Dress Uniform) jacket. Over this he has an LBV, or
load-bearing vest, with various pouches and strapping attached, so three levels
of clothing just for the torso. We need to create the definition between these
three layers and make them look like they are actually separate items. So I
start by lightly scraping around the seams with the No.6 blade, moving to the
No.11P for the finer details and seams, removing unwanted detail as I go along.
I also removed all of the moulded straps and webbing, leaving a slight
indentation, planning to replace these with more detailed versions.
This is the torso completed with another untouched to
show what you actually get in the kit.


Normally I start with the legs, mainly because I find the
most tedious part of this process detailing the boots, so I like to get this
out of the way early on. Detail on boots is usually very soft indeed and the
lace area in-particular can be very poor. Even if you don't go to town on the
re-scribing of the rest of the figure, I think adding some detail to the boots
really does make a big difference.


Once I tidied up and re-scribed the boots, I removed all
of the lace detail and scribed a line to represent where the front would lace
together over the tongue. In the past I have "laced" boots with fuse
wire (which is very time consuming) or stretched-sprue (which has a tendency to
melt if you use liquid poly to glue it on), but I discovered a far better and
quicker way of getting a good looking, quick result. I use a piece of diamond pattern mesh of a
suitable size (I use aluminium because it is soft, but brass will work just as
well) and then I cut a line of X's off the edge. Once trimmed to shape it is
just a question of super-gluing it over the front of the boot and adding the
lace holes with a fine needle. You can
get this mesh from varying sources but the one I use is Aluminium Micro-mesh by
Scale Scenics.


Generally I will clean up and re-scribe all of the main
body parts before assembly, mainly because I find it easier to hold them that
way and you have more access to all of the part. Hopefully the pictures should
give you a far better idea of the result, before and after. The orange parts in
these pictures are an untouched version of the same figure from another set.


Once the parts are assembled, I begin to add the detail
back in, either scratch-building detail or using better quality aftermarket
parts. In this case I have used a replacement Hornet head, kneepads from Live
Resin and an M733 from Trumpeter.


Pocket detail is a great example of how this scraping technique
can be used to really bring an area to life. Concentrate in particular on
creating an undercut for the pocket flap, making it look like it is a separate
piece of cloth instead of a moulded on blob. A more tricky procedure is to
reproduce the outer seam line around some pockets, this is where the 11P blade
comes into its’ own. Just work slowly and methodically around the edge and
don’t press to hard, you can refine this later when the preliminary line has
been created. You may find it more comfortable to use a needle to create the
initial line instead and then refine it with the blade.
Jacket buttons are usually mis-moulded and lack any
definition and there are several different ways of replacing these. You can use
a punch and die set with some thin plasticard or foil, or even just a thin
slice from a piece of plastic rod or stretched sprue will work. Some years ago
I invested in a gadget called the “nutter”, this is a series of punches of
varying diameters that are used to literally punch a disc from a sheet of foil.
This tool creates a slight dome shape to the button which looks really good
when painted. An expensive tool but it certainly does give great results.


Another area that is usually crying out for some
attention is the cuff detail on sleeves. Sometimes you can get away with
scribing around the wrist area to make it look hollow, more often than not
though, I will remove the hand and drill out the sleeve instead. Normally I
glue a piece of sprue to the hand to re-create the wrist and file this to shape
before placing this back into the hollow cuff. The advantage of doing this is
that it gives you more flexibility if the original fit is not great or you want
to alter the pose of the hand slightly. This is also the process I use to fit
the head, usually using one from the excellent Hornet range.


For webbing and straps, a lot of the time you can get
away with just scribing around the moulded on detail, it gets a little more
complicated if you want to take it further but gives a far better impression. The
first order of business is to get hold of a decent set of etched brass buckles,
there are sets available from several manufacturers depending on your needs and
the historical period being portrayed. The set I used on this particular
figure, and the one I find most useful, is by Black Dog (35001 Fasteners and
Buckles). This is one of the few sets that include the modern plastic buckles
as well as several other traditional metal types in various sizes.

I have tried various materials for straps; lead foil,
paper stiffened with super-glue and all sorts of other random materials, what I
use now is common electrical tape. Any colour will do but I like to use blue as
it is highly visible and is more obvious when you miss a bit painting it. Once
the adhesive is removed (using a cloth dampened with lighter fluid), I find it
extremely versatile and it is great for portraying straps under tension as you
can stretch it slightly.


By far the most fiddly bit is cleaning up the buckles and
threading the tape strapping through them, even with the aid of an optivisor !.
The rest is easy, just scraping off the moulded-on versions and replacing them with
actual 3D examples. Depending on the strap type and location, sometimes I will
build up folds around the straps with putty to give the indication that the
underlying uniform is being displaced by the strap. You can see an example of
this around the straps on the kneepads of this figure. This gives a far more
natural look.


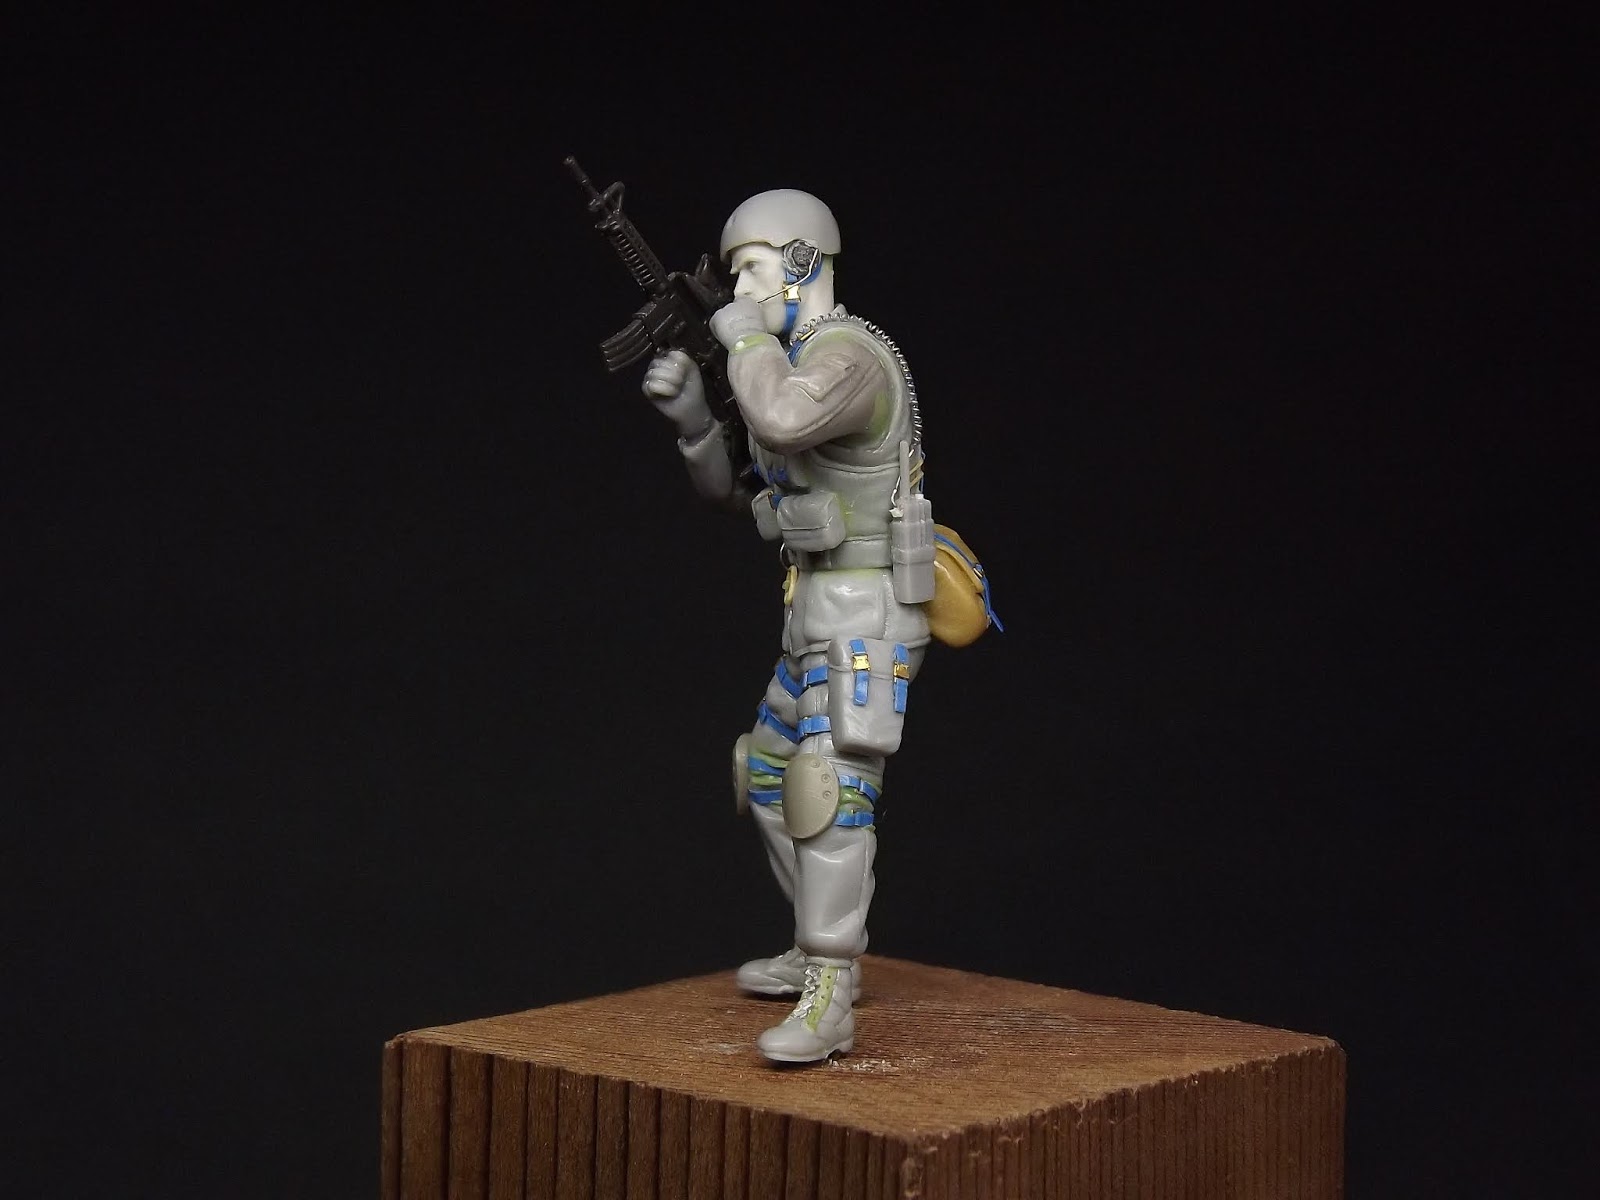
As you can see from the pictures, I tried out quite a few
different options for the arms before settling on the final pose. Couldn’t have
yet another pointing figure now, could we !


The figure example I have used for this article has a complex,
layered uniform with a large amount of straps, belts and buckles, so detailing
this took quite some time. It is probably at the extreme end of the spectrum
with regard to detailing work, by comparison a WW2 Russian soldier should take
far less time to do. I think you will agree though, if you compare the detailed
version with the stock figure it looks 100% better.
So here we have the finished figure, albeit without his
goggles as yet, finally ready for painting.


It is easy to get carried away and rush this process but
it does take some time and of course depends on the complexity of the figure
and the amount of detail you want to add. You may not want to go fully down
this detailing route, perhaps just using it in selected areas, but hopefully
you can see that with a little work you can really lift basic plastic figures
to another level. The benefits manifest themselves when you come to the next
stage, it makes it far easier to paint them.
This article originally appeared in the January 2017 issue of Military Modelling magazine. And no, I still haven't got around to painting it yet !
This article originally appeared in the January 2017 issue of Military Modelling magazine. And no, I still haven't got around to painting it yet !